Have you long dreamed of creating a cozy place in your own garden, but are not yet ready to build a full-fledged gazebo? This means that one of the modern types of canopies will be ideal for you: wooden or plastic, with a reliable roof or one through which all the night stars are visible. Add a little textiles and imagination, and such a budget building will look no worse than a real summer cafe!
Moreover, building a canopy with your own hands today, with all the abundance of construction and finishing materials, is not at all difficult. The main thing is to decide for what specific task it is needed - for a car or summer get-togethers with friends, a swimming pool or just a bench, and choose the appropriate material. And our photo instructions will help you consider the whole process in detail and become well versed in this matter.
Rules for the use of raw materials
There are rules for handling polycarbonate sheets established by experience:
- You should not store the material in the light; you should consider the way they are stored in the warehouse;
- the material should not crack from twisting;
- The protective film can be removed only after finishing work with the sheets;
- work on installing the flooring should be carried out quickly;
- The slabs must be laid with the UV-resistant side facing outwards, as indicated on the surface of the protective film.
Leaving cellular polycarbonate in the film in the open light will cause it to stick tightly to the plate, that is, a photochemical reaction, causing the material to become unusable.
Self-production
The most affordable canopy designs are made from profile pipes and polycarbonate. Let's use a specific example to step by step analyze the entire technological process of assembling a canopy with your own hands:
You can easily build such a canopy on a metal frame with your own hands.
Expenses
We draw a diagram of the location of the canopy and calculate the cost of manufacturing a structure with dimensions of 1700x2500 mm:
- Profile pipe 40x20 - 36 linear. m at 67 rubles/meter;
- Profile pipe 40x40 - 24 linear. m at 95 rubles/meter;
- Polycarbonate 6 mm – 2 sheets for 1750 rubles;
- Washers and screws for fastening – 300 rubles;
- Paint – 300 rubles.
Total: 8500 rubles.
Prices are valid for autumn 2021 for Crimea. The cost of metal and polycarbonate in your region may vary. You can also assemble the structure from steel corners, but the gain in price will be insignificant.
On a sheet of paper we draw a schematic arrangement of the main elements of the frame
Step-by-step instruction
To work we need the following tool:
- Welding machine;
- Angle grinder with metal discs (grinder);
- Hammer for attaching the canopy to the wall of the building;
- Construction square and level;
- Hammer, metal brush;
- Brush for coloring.
| Illustration | Description |
| Sample. For ease of construction, we will build a temporary rectangle from a profiled pipe 590x2000 mm. It will serve as an improvised template for making trusses. | |
| Truss frame. We cut and weld the first truss. | |
| Spacers. To strengthen it, we cut off the pipes and mark the attachment points inside the truss. | |
| Farm assembly . We weld all the parts into a single structure. We clean the seams, preparing the metal for painting. | |
| Assembling the second and third trusses . We measure the pipe for reinforcement using a ready-made truss. We connect all the parts by welding to get 3 identical roofing structures. | |
| Coloring. To protect the metal we use special anti-rust paint. Leave the parts for several hours until completely dry. | |
| Installation of the mount on the wall of the house. Every 3 bricks, we drill and hammer pieces of reinforcement into the joints.
In parallel with fastening to the wall, we install and cement the support pillars. We also connect it with a jumper into a common structure. | |
Truss installation. We weld the support pipe to the reinforcement, and install all the trusses on it and weld it into a single structure.
| |
Installation of jumpers under polycarbonate. We weld guides to the trusses with a pitch of 600 mm.
| |
| We sew up the gables. We screw the polycarbonate sheet to the gable and cut it along the contour of the truss with a construction knife. |
All that remains is to position and secure the polycarbonate sheets on top using special self-tapping screws with thermal washers and install plugs on the ends to prevent dust and moisture from getting inside.
This beautiful and inexpensive canopy can be built in a few days on your own plot
Advantages and nuances of construction
The photo of polycarbonate canopies shows universal outdoor structures that perfectly transmit natural light and have a wide range of colors.
The raw material is quite light, transparent and has a variety of convenient thickness formats, this helps to create any type of structure: from simple to curved parts. In addition, they easily and harmoniously fit into any interior and landscape of a personal plot.
Polycarbonate canopies are divided into the following types:
- separate, self-standing ones are most often acceptable for swimming pools, gazebos, greenhouses, carports in parking lots and over outbuildings;
- the mobile type quickly moves to any selected point of the perimeter: barbecue roof, compact gazebo;
- as an extension to a garage, bathhouse, veranda, porch canopy.
These structures can be rectangular, curved, or two-story. They are also divided into open and closed models, for which the walls on the sides are usually covered with glass, gratings, lining, or thick textiles.
The building includes pillars for vertical support and the roof itself. To make frames, wood, metal beams, concrete, brick, and stone are used.
Preparatory work
If all the above aspects are taken into account, you can begin preparing the site for construction. The marked area is cleared, trees and bushes are uprooted. The existing turf is removed to the depth of root germination. The cleaned area is leveled by adding sand or small gravel and compacted.
Related article:
Canopies and awnings over the entrance: photos with impressive style. Original and practical canopies and awnings over the entrance: styles and shapes. Color solutions and advantages. Canopy over the porch.
Under the supports of the canopy attached to the house (the photos clearly demonstrate this), holes are drilled with a cross-section of 20 cm and a depth of 50-60 cm (to dense soil). At this stage, it is necessary to provide for laying the cable under the lighting fixtures. The pitch of the supports depends on the area of the extension, as well as on the frame material and the weight of the roof. The heavier the structure, the more frequent the pitch of the pillars (on average every 1-1.5 m). The advantage of such a base is that it does not need to be connected to the main foundation of the building.
A bucket of crushed stone is poured into the finished recesses, vertical posts are installed in them and filled with concrete. Each pillar is leveled. The second option is to concrete the embedded parts with brackets in the pits, and the pillars are already fixed in them.
The materials should also be prepared before installation: the wood is impregnated with an antiseptic, dried or painted in the chosen color. The lumber chosen is dry and must be sanded, otherwise woodworms will quickly appear under the bark.
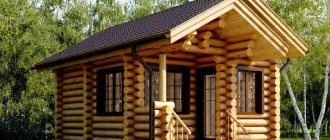
Canopy on wooden supports
Helpful advice! If the house is located in a low-lying area, the ends of the wooden supports are additionally waterproofed (wrapped in a plastic or roofing felt jacket and filled with hot bitumen).
Metal racks must be coated with a primer that contains zinc phosphate. It’s better to immediately purchase a galvanized or aluminum profile.
While the concrete in the pits is gaining strength, you can install a floor covering for the shed. Options:
- pour concrete screed;
- lay paving slabs or boards;
- cover with sand or gravel.
Canopy using tempered glass
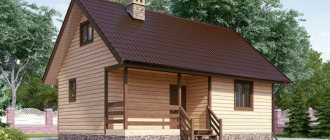
Wooden canopy
The easiest to install and relatively cheap way to create a universal street roof is a polycarbonate canopy with a wooden support.
This work does not require professional equipment or special skills at all; an ordinary set of tools, which almost any owner has, will do.
You will need glued and profiled timber, rounded logs, and wooden posts. To build a rafter system, you will need edged boards.
Please note that the design has quite significant disadvantages:
- does not retain moisture well;
- susceptible to rotting and fungal diseases;
- quickly loses strength, reliability and aesthetic appearance, which leads to product failure.
To avoid these factors, it is recommended to treat the canopy and canopy with a fire-resistant composition, antiseptics and protective layers of oil and varnish.
Porch installation
In the case where the veranda was originally included in the project, all you have to do is construct a staircase and decorate the area.
If we are talking about an extension, we act on the following points:
— We draw a plan of the future structure on the ground;
— We're laying the foundation. Recommended depth from 0.6 meters;
— We lay waterproofing on the finished foundation, on top of which supports for the roof are installed. We treat the lower part of the beam with bitumen to avoid rotting;
— Using anchors, we install the roof base onto the supports;
— We install the stairs;
— We are attaching the porch canopy. It is better if the roofing material of the canopy is the same as the roofing material of the bathhouse itself, so as not to disturb the aesthetic impression.
Important! The canopy is mounted at a slight angle to avoid water accumulation.
This is how, step by step, you can design your own canopy with a porch for a bathhouse.
Metal construction
Before making a metal canopy in the yard, you need to take into account the following parameters of the structure:
- A forged base will be the most elegant and attractive, but it will require significant expenses. If funds allow, it is better to make an exclusive product to order.
- The most common and relevant building is a canopy made of round or profile pipes. The size of the pipe directly depends on the size of the building.
- Prefabricated finished model made of aluminum.
The main advantage of an iron canopy is its durability, but despite this fact, it is easily susceptible to corrosion.
To avoid such a nuisance, it is recommended to first clean the product with a stiff brush from possible rusting and scale, then treat the entire surface with abrasive and wipe with a solvent. The next step is coating with primer or paint.
Please note that the railings of a porch or gazebo should be made of wood, since metal quickly heats up from the sun and cools down from frost!
- Lawn laying
A garage at the dacha is not a warehouse, but a modern and comfortable space!
Diesel generator for home: which one to choose?
Installation of stairs
A few simple ways you can make steps:
We assemble wooden boxes of the same length, but different in width. By fixing them on top of each other, taking into account the common wall, we get a staircase. The number of boxes depends on the number of steps. One box - one step.
We construct the side walls of the gangway from bricks. Then we install boards on top of the brick.
We buy ready-made ones. This way you will save time on installation. You can purchase the finished product at a construction supermarket.
Important: it is necessary to determine the angle of inclination of the stairs. According to sanitary standards, it varies between 27⁰-45⁰. Then we determine the total height of the porch and calculate how many steps there are. The desired height of the steps is at least 16 centimeters. Make the depth of the steps based on personal preference. Recommended depth is about 27 cm.
Stone and brick as a base
All types of polycarbonate roofing with a stone, brick and concrete base look very luxurious, rich, but at the same time do not lose their lightness, which is ensured by a transparent canopy. Such supports are easy to maintain, resistant to fire, cope well with natural precipitation and are resistant to mechanical damage.
However, their installation will require significantly more time, effort and financial costs. Moreover, this building is being built for a long time, since it cannot be dismantled, that is, moved to another place on the territory.
Creating a Project
When choosing a design project, it is worth deciding on the following parameters:
A pre-created project allows you to choose the best solution and select high-quality material
Before installation work, a drawing must be completed. Based on the size of the building, the required amount of material is determined.
Helpful information! When creating a carport, it is worth considering the passage of a loaded vehicle.
Peculiarities
For residents of private houses, life often revolves around housework and gardening, but sooner or later they get tired of this cycle and want something different.
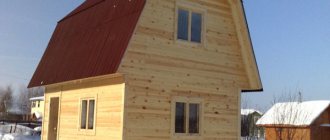
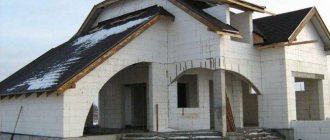
The simplest and at the same time useful option would be to build a bathhouse. This place will help you relax after a hard day, take a break from everyday worries and be alone with yourself, if there is such a need. To build such a building you only need to know how to do it, otherwise the project may be unsuccessful, and the construction is not only not functional, but also life-threatening.
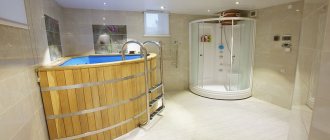
In order to be able to steam and wash in the bathhouse, it is necessary to provide at least two rooms, but it is best to supplement them with a bathroom for complete comfort.
When building a bathhouse, special attention is paid to the wiring, which must be completely protected from moisture and grounded. It is best to hire professionals for such important work to be completely confident in the quality of the work.
When thinking about a bathhouse, the first thing you need to think about is its future project. In addition to the fact that in the steam room you can give the body the opportunity to spend some time under the influence of high temperatures, and then take a contrast shower, friendly gatherings in good company can be very pleasant.
In order not to break away from the process and one stage smoothly flows into the next, it is best to provide a relaxation room either in the bathhouse itself or near it.
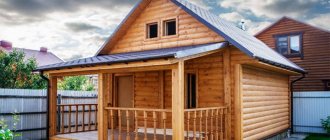
The most convenient and useful option is to build a bathhouse with a gazebo under one roof. This not only simplifies construction, but also makes it possible to easily move from one area to another.
By properly planning the gazebo and placing a grill and barbecue in it, you can enjoy delicious dishes after the bath and truly relax. If you spend a lot of time in the gazebo, it is worth equipping it with lighting and placing comfortable and upholstered furniture for the most cozy atmosphere.
Important material properties
When making a polycarbonate canopy at home with your own hands, take into account the specific properties of the material.
- Both honeycomb and monolithic materials are subject to thermal expansion and contraction. Therefore, the holes for fasteners should be significantly (3-5 mm) larger than the diameter of the screws. The latter are equipped with a so-called thermal washer made of weather-resistant plastic, which fits tightly to the sheet and seals the hole.
- Cellular polycarbonate is not very strong, and with a small number of fastenings it can be torn off by the wind. Therefore, the screws must be placed in increments of no more than 50 cm, preferably about 30 cm. Monolithic sheets are much stronger, for them the recommended fastening spacing is 50-70 cm.
- Cellular polycarbonate is susceptible to moisture if installed incorrectly. During rains and snow melting, water can penetrate into open cells, freezing, destroying them, penetrating further, etc. Therefore, the ends of the sheets must be covered with special profiles, tapes or sealed in another way (silicone, polymer mastic). But if the end with an open cell is facing down, it is decorated with a perforated profile so that condensate can flow freely from the holes.
These rules do not apply to monolithic sheets; they are installed almost in the same way as metal corrugated sheets, the only difference is in the material of the sealing washers (not rubber, but transparent, light-resistant plastic).
Before polycarbonate was coated with a UV filter, the service life of the material was 7-10 years. Sheets made today retain transparency and strength for 10-15 years if they are in direct sunlight and more than 20 years if the canopy is located to the north of the house or in an area shaded by tree crowns.
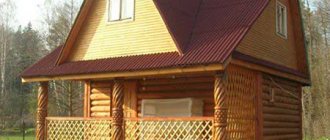
Advantages of combining a bathhouse with a gazebo
Extensions to bathhouses have become widespread in recent years. This is far from an accident. Such associations have many advantages that attract people who want to start construction.
Adding a gazebo to the bathhouse will save space on the siteSource erp-mta.ru
The main advantages are as follows:
- When you want to go out and get some air, you won’t need to wander around the yard. You can sit comfortably at the table. It is not only convenient, but also pleasant.
- Combining two buildings makes it possible to save space in the yard. This is especially true if the area is small.
- Easy to connect communications. This is much easier to do, because many organizational issues are eliminated. For example, when providing lighting for a gazebo, you can use a power cable and a bathhouse switchboard.
- Construction of a gazebo as an extension to a bathhouse will cost approximately 30% less than if you build the same structure separately.
An additional plus is aesthetics. The combined objects look quite beautiful.
Roof for a bathhouse with a gazebo
Since we are talking about a common roof, we must immediately decide at the design stage what it will be like. The proposals are still the same: single- or double-slope, hip, hipped.
Shed roof
This design has one advantage - one slope, which requires the least amount of building materials. This type of roofing structure is rarely used to cover a bathhouse with a gazebo, because the structure itself is quite long compared to the width. Although there is an option to make a slope on the side of the building. Such a structure does not always have a presentable appearance. But for some developers, this is sometimes the only way out of a situation of low availability of money.
There are buildings in which the slopes of two parts of the complex are made in different directions. For example, a bathhouse is covered with a roof sloping towards the back wall, and a gazebo towards the side wall. But it will no longer be one roof.
Gable
This is the best option, because the gable roof easily covers two structures attached to each other. One learns a single architectural structure, under which it is not visible that it consists of two different buildings. In addition, this option is simple to construct and is not the most expensive in terms of price.
A hip roof is also a good option. It covers both the bathhouse and the gazebo with a single structure. The only thing is that the roofing structure is not so simple, it has many additional elements, plus a large waste of roofing material due to the shape of the slopes: trapezoid and triangle.
In conclusion
Now you know how to build a canopy for the yard yourself, and you can implement the proposed option. The attached video will show other options for canopies, and if any questions remain unclear, contact me in the comments. Good luck, comrades!
Did you like the article? Subscribe to our Yandex.Zen channel
January 13, 2021
House, Roof
If you want to express gratitude, add a clarification or objection, or ask the author something, add a comment or say thank you!
Where to place the gazebo
You can, in principle, place the gazebo in any convenient place
It is important to take into account only the expected specific use of this space. If the gazebo, among other things, will be used for sunbathing, then it should be equipped on the sunny side
If the building is intended as a place where you can hide from the daytime heat, then it is better to make the extension the other way around so that the main structure of the bathhouse serves as additional protection from the sun. It is also important to take into account the view that will open from the gazebo, because it is much more pleasant to spend an evening in the company of friends, contemplating the sunset, than the neighbor’s fence.
Placement of a bathhouse on the site
Design styles
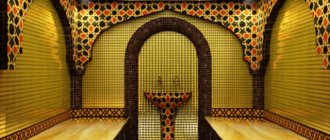
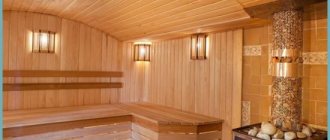
Let's look at the most popular design solutions for decoration and interior decoration.
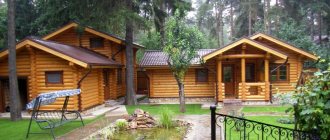
Chalet
Characteristic features of the style:
- Use of massive forms. The building is created with a large area.
- The main building materials are natural logs and stone.
- The location is in a landscaped area, preferably near a pond. The building should blend into the landscape.
- Inside the room, wooden beams protrude from the ceiling. They are not hidden behind decor; on the contrary, they are made the center of style.
- The usual living room is replaced by an open terrace or gazebo with a fireplace.
Modern
The modern direction of style gives owners freedom in choosing shapes and decoration ideas. Art Nouveau is about unusual shapes, interesting angles and lines. Although it is believed that a gazebo in the Art Nouveau style should be round in shape, an interesting design for a corner placement will also fit into the style.
It is recommended to pay attention to lighting. There should be as many windows as possible
Even better if they are panoramic and overlook the garden. The gazebo is made summer or closed. There are no restrictions in the choice of colors.
Loft
The name of the direction is translated from English as attic style. This is a rough finish without unnecessary frills, straight lines, contrasting colors.
When choosing furniture, preference is given to metal and wood. The form should be simple. It is better to leave the wood unpainted and cover it with varnish. There should be many light sources. When daylight is not enough, it is compensated with artificial lamps and lamps.
Half-timbered
The building can also be made from logs. The gaps in the frame are filled:
- pieces of stone, brick;
- concrete;
- lumber residues;
- clay.
This combination of raw materials makes the building unusual in appearance.
High tech
A modern design direction characterized by various innovations. The latest sanitary ware is used for the bath. The building is equipped with a smart home remote control.
In high-tech there are no restrictions in the choice of materials for finishing and interior design. Windows are left open without curtains for a better view. The shape of the structure is always made non-standard, at oblique, right angles.
Scandinavian
The style is similar to rustic. The shape of the structure with clear straight lines. The range is dominated by classic colors (white, black, brown) and their contrasting combinations.
There are no bright decorative elements. Natural stone and wood are used in construction. A stove or fireplace is installed inside the room.
An addition in the form of a gazebo is a great way to increase the comfort of relaxation and expand the usable space of the bathhouse. Such an extension will allow you to enjoy the beauty of nature in the fresh air or watch what is happening through the window.